I couldn't get the mesh from the exported 3ds Max file to show in Substance Painter. When I tried to import it as a new file, it said it couldn't import the scene properly, so I think there's an error with my exported mesh.
I now know how to export the model. I had to export it twice, but the second time I named the mesh SM_LP_Mesh_Cage so that we know the difference between the high and low poly mesh.
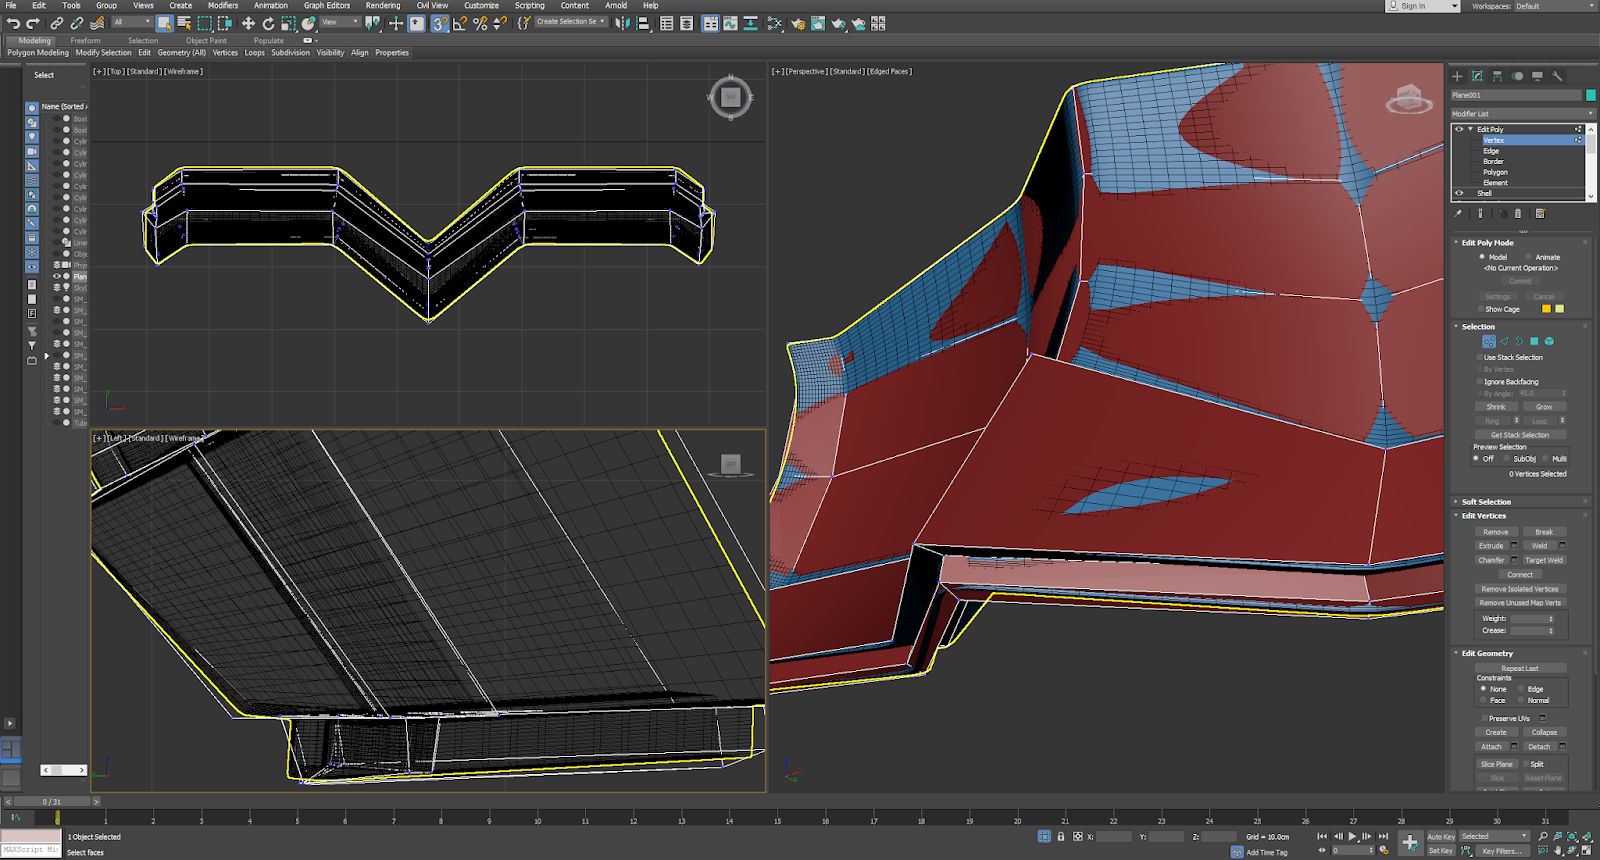
The base scoop is now refined and ready for the uv editing and unwrapping. How I refined it was I beveled some of the polygons to have it match up with the guide object, and then I shaped it the way it should be shaped.
The base scoop for the robot is created, and now the refining process will begin. After the refining process, I will unwrap it and it will be finished.
The uvs for the piston connector are unwrapped, which means the connector for the piston is finished. Each step is getting closer to the final low poly mesh of the robot.
Each time I create a new object in 3ds Max, I start to like the program more and more, and it gets easier and faster to create objects and unwrap them. Anyways, the piston connecter is finished being modeled in low ply form, and now I will unwrap it.
After I unwrapped the uvs for the arm support, I created a piston for the arm. I used the chamfer tool to give it more detailed look. I will now map and unwrap the piston and move onto the next object.
The detailing if the end of the arm support is finished, and it turned pretty alright from watching the instructor and taking what I learned from the previous videos and using it as guidance.
As described in the video, naming and numbering each of the assets is important so that when you need to change some things in an environment, you can find that specific object in the scene without having to dig for it for an hour or so. It's like naming all the layers in a project like in Photoshop, Illustrator, etc.
This is just a summarization of the videos about uv mapping modular meshes and texturing basics in 3ds Max for environments. In the next video, the finished touches will be made to the scene.
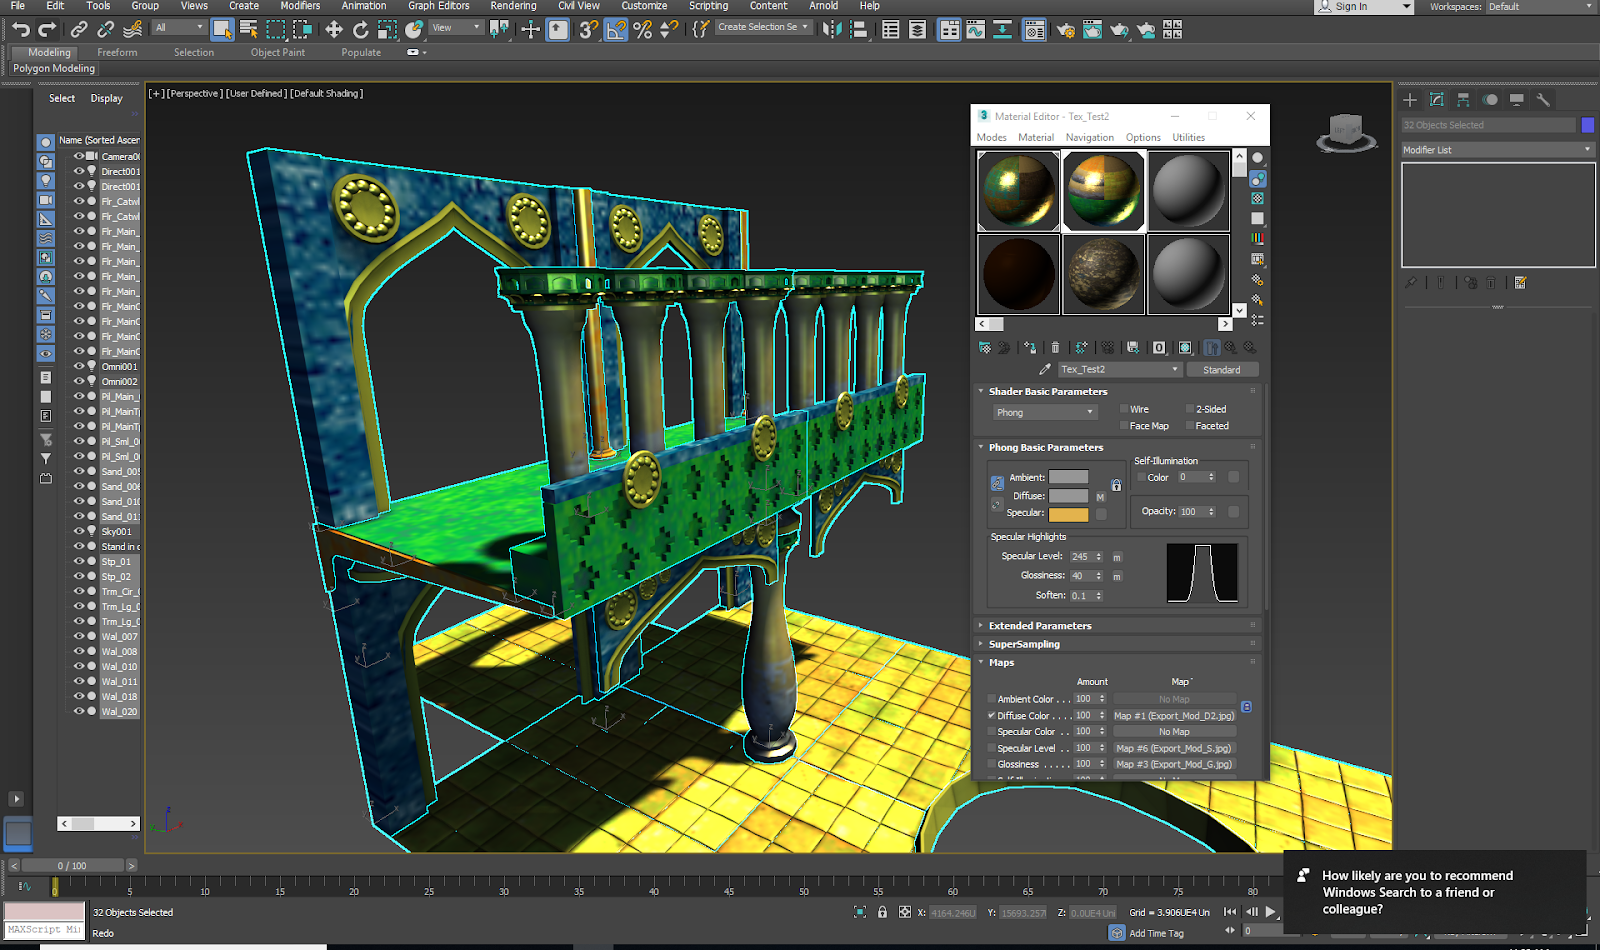
Changing the material for the meshes is very similar to changing them on a regular object. As a matter of fact, it is a lot easier than changing the material for a regular object because it doesn't get confusing when you try to find the right material for the right object. It's all right there.
The instructor talked more in depth about uv mapping the modular objects in an environment, and that you can use those for how you want people to see the textures on the objects.
I fixed the grid tile for the floor unit, and I know now how to change the color of the grid in the uv editor. I also now know how to isolate a texture to only work on just that piece.
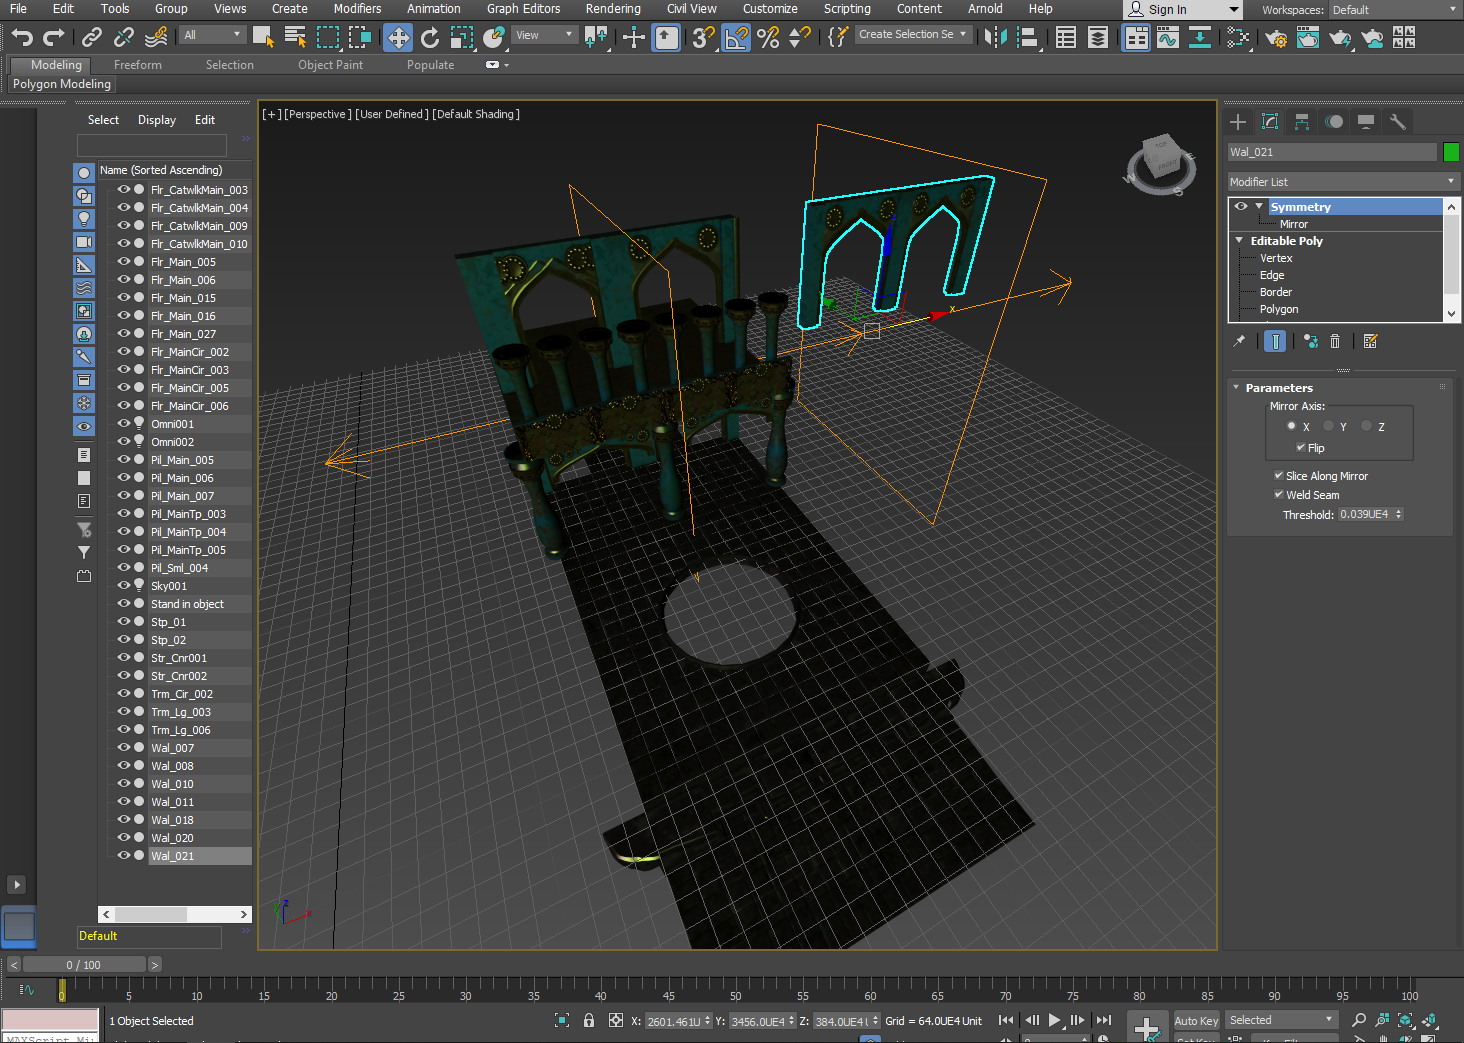
So, I learned that when I clone an object with uv maps, that uv map gets also cloned with the cloned object. I also learned that I can move uvs to make it look like the mirrored object is different from the other object.
The instructor explained that when you use uv maps in a large scene, make sure they have their own groups so that the map wont be all over the place and then you have errors that are hard to fix.
Like in the one video about scales, having the correct scales, especially for hallways, doorways, and windows are important because if the character is too big to fit through, you'll have to go back into the original file and resize everything to a bigger scale.
In this video, I learned how to clone an object, mirror it or in other words apply symmetry to the object, and it saves time when creating walls for a scene and other objects.
The instructor basically gave an overview of what to do and not do with modular systems. The most important thing to not do is not make it very complex, especially with floor units. Make them into separate pieces so you can place them like a puzzle. It keeps things organized and simple.
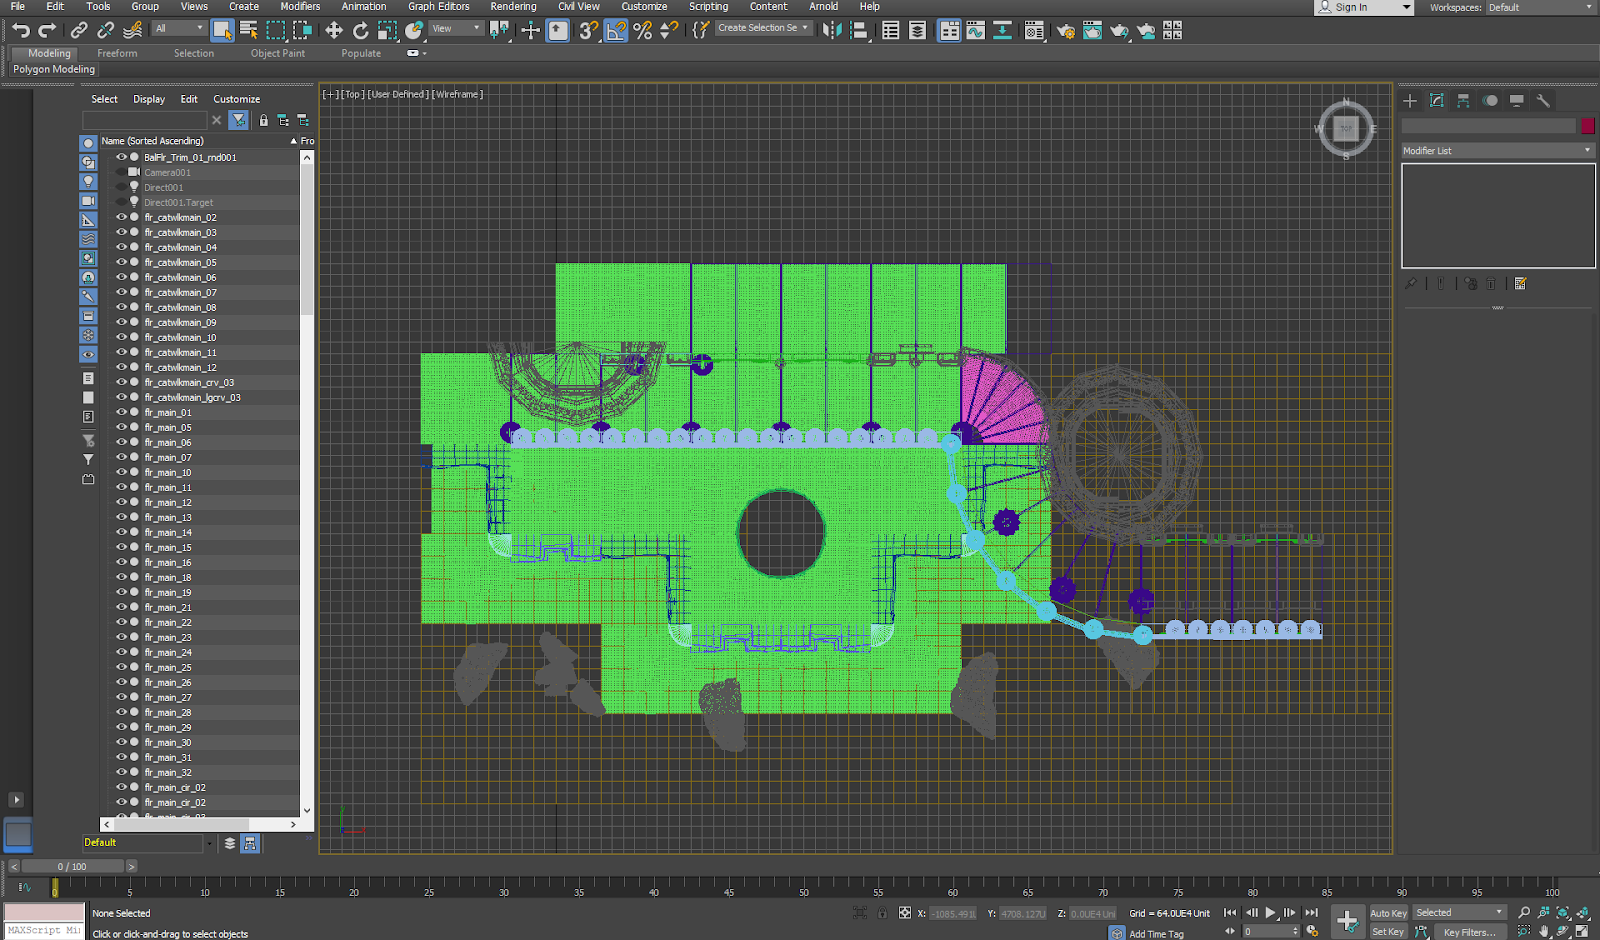
I have the scene fully gray boxed for the more complex modeling process. Now that I have the gray boxing for the scene to make the details in, I will now be making the full models for the scene.
This was just an explanation of planning where to put and place your modular meshes. It is very important to plan where they go because you don't want a lot of back-facing objects in your scene. It will become too complex and you'd have to back track a bit to see what you missed.
In games, I learned that you don't see everything that has been modeled, and those are the back-facing polygons. It is still smart to model the back of it so that it doesn't clip into the scene and make it look unfinished, but that's what camera angles are for.
Making the wall modular unit was about making sure the pieces of the grid fir to the right scale of the original, which should make everything snap together easily.
I now know how to make see through objects in an environment, and it'll be useful in making underwater levels and also for characters in a game if they collide with something invisible.
So pivot placement is important because it will make modeling a lot easier since the pivot is hard to find on objects sometimes, and it'll also make the modular process a breeze.
What I learned from watching this tutorial video is that changing the scale effects the whole scene, and that also includes objects being imported and merged into the scene.
So, I got to create the eye sockets for the head, and using the editable poly modifier makes it easier to get the correct edges on the eye. I will now start the detailing and shaping process of the eye socket.
The head for the low poly robot is created and ready to go through the uv mapping process. Apparently, 3D modeling is mostly just creating, extruding, and uv mapping over and over again. It's a good cycle, and it's not hard to master.
I got the unwrapping done for the tracks, so the bottom half of the low poly robot is almost completely finished. I will now begin the creation of the low poly head.